Pie! Spanakopita and rhubarb crisp

Spanakopita

I woke up feeling a bit giddy this morning.

It’s not just that it’s Friday, or that the sun is shining and the temperature is perfect, though all of that could explain it easily enough. I think it was because I knew I’d get to spend the first part of my morning writing here, hanging out with you, and participating in my very first Let’s Lunch! That’s a nice way to end the week, don’t you think?

For those of you who don’t know about it already, the Let’s Lunch group hosts a virtual potluck lunch once a month. The group chooses a lunch theme and then the participants post their interpretation of that theme on their blogs on the same appointed day. I know! Isn’t that cool?!

The theme for this month’s lunch is “pie”, sweet or savory (or both).

Sometime right around the time the theme was chosen, M and I were messing around with making goat-milk feta, so it didn’t take me long to settle on making a spinach pie with feta. Our fridge was bursting with feta and the farm stand was bursting with spinach and scallions.

Spanakopita - Feta chunks

Spanakopita - Greens

I wanted to make this spinach pie a bit “goaty”, so I added some home-made chevre to the recipe on top of the goat-milk feta. I don’t think it affected the flavor much (not as much as I’d hoped), but it did make the filling extra creamy and luscious. If you don’t like goat flavor, by all means, use sheep- or cow- milk feta and omit the chevre. Or try adding a few ounces of crème fraiche, marscapone or other soft, spreadable cheese to get that creamy texture.

Spanakopita - Chevre

The process for making spanakopita is mostly very simple: wilt the spinach either by stirring in a hot pan or blanching briefly in boiling water (you can even use a package of defrosted, chopped frozen spinach if you’re in a pinch); saute the scallions in a little olive oil for a few minutes to bring out the fragrant flavors; then mix the greens (spinach, scallions, chopped dill, chopped parsley) together with the cheeses, a couple of lightly-beaten eggs, a little salt and a touch of nutmeg or any other spices you like.

Spanakopita - Mixing the filling

The one semi-tricky part of making spanakopita is handling the phyllo, but as I keep re-learning, the best way to deal with phyllo (and most other things) is to be patient with yourself and just relax about it all.

Spanakopita - Filling

There are all sorts of tips out there for handling phyllo to keep it from drying out, and for working really quickly, and for getting really smooth layers. All I can say is that when I relax and don’t worry about it, it works out just fine. If it rips, so what? A typical package comes with many more sheets than you’ll need for one pie; don’t stress about tossing a few if you have to. Anyway, once you layer the sheets down and brush with olive oil, cover it with spinach and cheese, and bake it, it all comes out flaky and delicious, rips or no rips. That said, I included a link in the recipe (at the end of this post) for a video that shows one way to handle the phyllo with ease.

Spanakopita - Baked

I had originally planned to just make the one pie, but it’s rhubarb season around here and I couldn’t resist making my favorite rhubarb crisp recipe, which is so easy and perfect, I really could make it every night while the rhubarb lasts.

Rhubarb crisp - Rhubarb

This is a rhubarb-only crisp, but you can certainly add strawberries if you like. I used to make it with strawberries, but once, when our rhubarb crop exceeded our strawberry balance, I tried the rhubarb on its own and discovered that I loved it that way.

You can assemble this crisp while the spanakopita is baking, then throw it in the oven when the spanakopita comes out and you’ll have a warm, fresh crisp ready for dessert.

For this recipe (in detail at the end of this post), all you need to do is wash, dry and chop the rhubarb into small pieces, and toss it with some sugar; in a separate bowl, mix up the topping (flour, brown sugar, ground ginger, butter).

Rhubarb crisp - Cut and sugared

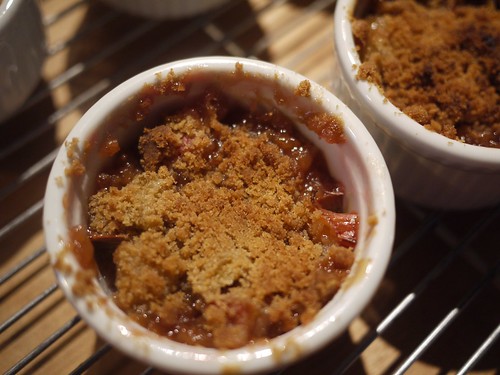
Assemble the crisp by putting the sugared rhubarb in a baking dish (or in ramekins, as I did), sprinkling on the topping, and then baking for about 40 minutes.

Rhubarb crisp - Topping layer

Because we are crazy goat people, I topped mine with a little goat-milk gelato, but the crisp is just fine on its own. It makes a pretty nice breakfast, too.
Rhubarb crisp

Thank you, Let’s Lunch friends, for inviting me into your group and giving me a great excuse to make pie! I love the idea of this group. The only flaw I see in the concept is that the lunch is virtual. Wouldn’t it be wonderful if we could all meet on a tree-shaded hillside on a warm summer day, lay all our pies out on long wooden tables, and taste a slice of each in person while we gossiped, sipped wine, and watched the children and dogs play? *sigh*

Maybe someday.

For now, readers, you can join in the virtual lunch by making your own pie. For inspiration, take a look at the pies my fellow Lunchers have made for today:

Pilaf pie with chicken, sultanas and sweet spices ~ from Lisa at Monday Morning Cooking Club
Japanese curry pot pie ~ from Cheryl at A Tiger in the Kitchen
Lime custard n curd pie ~ from Charissa at Zest Bakery
Nutella hand pies ~ from Cathy at Showfood Chef
Dirt pie with compost cookie crust ~ from Linda at Free Range Cookies
Pecan pie ~ from Rashda at Hot Curries & Cold Beer
Summer chicken pot pie ~ from Denise at Chez Us
Three Recipe Lemon Meringue pie ~ from Mai at Cooking in the Fruit Bowl
Maine Summer Strawberry Rhubarb Pie with Lemon/Lime Ice cream
~ from Caitlin at Caitlin Shetterly
Chicken Pot Pie ~ from Danielle at Beyond the Plate
Chinese sausage and roasted sweet potato hand pies ~ from Emma at Dreaming of Pots and Pans
Berry-Lemonade Icebox Pie ~ from Steff at The Kitchen Trials

Spanakopita

(Adapted from “Greek Spinach & Feta Pie”, by Susanna Hoffman, Fine Cooking Magazine)

Ingredients

  • 2 pounds fresh spinach, washed, dried, trimmed, and coarsely chopped
  • 3 tablespoons extra-virgin olive oil, plus approx. 1/3 cup for brushing on phyllo
  • 1 bunch scallions (approx 3 oz.), white and light-green parts only, trimmed and finely chopped
  • 10 oz. crumbled feta cheese OR 7 ounces crumbled goats’ milk feta cheese and 3 ounces chevre
  • 2 large eggs, lightly beaten
  • 1/2 cup finely chopped fresh dill
  • 1/2 cup finely chopped fresh flat-leaf parsley
  • 1/4 teaspoon freshly grated nutmeg
  • 1/2 teaspoon kosher or sea salt
  • Frozen phyllo dough sheets (9×14-inch), thawed and at room temperature

Method

  1. Position a rack in the center of the oven and pre-heat to 375°F.
  2. Wilt spinach by heating a large saute pan over medium-high heat, adding a few handfuls of spinach at a time, and cook while tossing gently with tongs. Continue adding handfuls of spinach until all of the spinach is wilted and bright green, about 3-5 minutes.
  3. Use a slotted spoon to transfer the spinach to a colander set in a sink. Let the spinach drain and cool slightly, then use your hands or the spoon to squeeze out as much liquid as you can.
  4. Wipe the pan dry with a paper towel, then heat the 3 Tbs olive oil in the pan over medium heat.
  5. Add the scallions and cook until they are soft, about four minutes.
  6. Add the spinach to the scallions, mix, and cook, stirring, for about 30 seconds. Transfer mixture to a medium-sized mixing bowl and let cool for five minutes.
  7. Add remaining ingredients (cheeses, eggs, dill, parsley, nutmeg, and salt) and mix thoroughly.
  8. Use a pastry brush to lightly coat the bottom and sides of a 9x13x2-inch baking pan with olive oil.
  9. Line the bottom and sides of the pan with several sheets of phyllo, brushing olive oil on each sheet of phyllo before placing the next one on top. For a nice demonstration of how to line the pan with phyllo, see this video on YouTube.
  10. Spread the filling evenly over the phyllo.
  11. Repeat the oiling and layering of several more phyllo sheets to cover the top of the pie.
  12. Brush the top of the last sheet with olive oil
  13. Bake the spanakopita until the top crust is puffed up and golden, about 40 minutes.
  14. Let cool before cutting with a sharp knife.

Rhubarb crisp

(Adapted from “An American Place”, by Larry Forgione)
For the filling

  • 1 pound rhubarb, trimmed, washed, dried, and cut into 1/3-inch pieces
  • 1/2 cup sugar

For the topping

  • 1/2 cup all-purpose flour
  • 1/2 cup packed brown sugar
  • 1 teaspoon ground ginger
  • 4 tablespoons unsalted butter, cut into small pieces and slightly softened

Method

  1. Preheat the oven to 375°F.
  2. Place the rhubarb pieces in a bowl, add the sugar, and toss well. Let sit for 20 minutes, until the rhubarb starts to release some liquid.
  3. While you wait for the rhubarb, combine all the topping ingredients in a small bowl and gently mix with your fingertips until the mixture resembles coarse crumbs.
  4. Divide the rhubarb mixture evenly into eight 1 1/2 x 3–inch diameter ramekins.
  5. Sprinkle the topping evenly over the fruit-filled ramekins.
  6. Place the ramekins on a cookie sheet for easy transfer to/from the oven.
  7. Bake for 40 minutes, or until the topping is golden and the filling is bubbling.
  8. Serve warm or at room temperature.
Aging gracefully

Crottin - 8 days of ripening

The Crottin and Valençay cheeses we made a couple weeks back are sitting in ripening boxes in our steadily cool basement, growing white fur coats.

Valencay - Ripening

When I opened the boxes today to take a few photos, the smell that came out of the boxes (and that still lingers in my office, where the ripening boxes are kept) smelled like…REAL CHEESE. Real, aged, wonderfully developed goat cheeses.

I almost can’t believe that we’re finally doing what we’ve been talking about doing for twenty years.

And I can’t wait to have our first taste of our first mold-ripened cheese.

Technically, the Valençay is ready to try in two days, at which point, we’ll remove them from the ripening boxes, taste one, and wrap the other three in cheese paper to allow further aging and development. We’re aiming for a slightly soft core, so that might take another three to four weeks of aging in the cheese paper. The Crottin tasting will follow a few days after the Valençay.

We will have to make fresh bread for both tastings. And, if there’s time, maybe some of this incredible looking Apple-Sage jelly from It’s Not You, it’s Brie. And you can bet a really nice bottle of wine will be involved.

And then we’ll make more cheese.

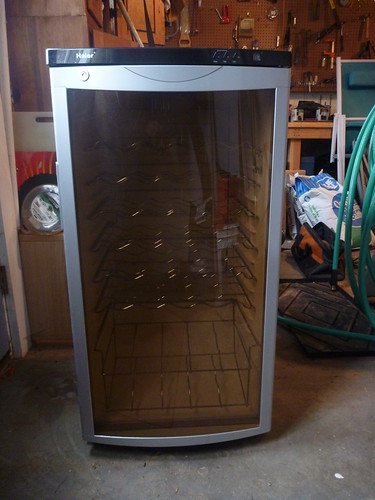
The ripening boxes seem to be working well, but we want a real cave. We don’t have one, and we’re not getting one anytime soon (and why oh why in the world did we not think about this when we had an entirely new foundation dug and poured five years ago??*), but we’ve found what we think is the next best thing: a great deal on a used wine refrigerator.

Future cave

Although we could use a standard/dorm fridge or a chest freezer as a cave (and many people do), we’d have to get an external, overriding thermostat to force it to stay at the temperature we want. Since wine is kept at approximately the same temperatures at which cheese is aged (coincidence? I think not) — anywhere from about 50 to 60 degrees F — the wine refrigerator’s built-in thermostat will let us directly set the temperature we want.

Besides, the wine refrigerator has that nice glass door so we can ogle our cheeses without letting the humidity out.

Speaking of which… in addition to temperature, when aging cheese, we need to control for humidity, so we got this little gadget — a hygrometer — which will let us know the humidity level in the cave.

Hygrometer

The Valençay wants a humidity level of about 85%; the Crottin requires 90%. Our house is now at about 38%. To add humidity, we’ll put a small bowl or cup of water in the cave (this is what we’ve also done in the ripening boxes and it seems to be working well).

Little by little, the pieces seem to be falling into place. The only thing left is to make a lot of cheese, and share it with you.


“““““““““

* M reminds me that we did think about having a cheese cave and/or root cellar dug as part of the new foundation, but it was one of the many things crossed off the list when we realized the renovation plans were 100% over budget. Ooops.

On our way with Valençay

Long before the goats arrived here, we loved goat cheese. We dreamed of some day making our own. And though we love fresh cheeses like chèvre as well as hard cheeses like clothbound cheddars and authentic manchegos (let’s be honest: we love almost any cheese), our true cheese love is reserved for the soft- and surface-ripened cheeses like the classic French Crottin, St. Maure, Selles-Sur-Cher, and Valençay, and the newer, outstanding American versions such as Cypress Grove’s Humboldt Fog, and Jasper Hill Farm’s Constant Bliss.

So, after experimenting for a few months with chèvre, goats’ milk ricotta, feta, and several other fresh cheeses, we’ve embarked on our mold-ripened cheese adventure. We’ve started with Valençay, and our first four cheeses are on their first day of draining in their pyramid-shaped molds now.

Valencay - Draining Day 1

After draining for another 24 hours or so, we’ll remove the cheeses from their molds, apply salt and ash to them, and let them age for two-three weeks. When the cheeses are complete, I’ll publish a detailed post about the process and results. For now, though, we’ll all just have to wait patiently for the milk, bacteria, and mold do their magic.

Mood lifter

A big package from New England Cheesemaking Supply Co. arrived yesterday afternoon.

Cheesemaking supplies

In the package: Crottin and Valençay molds, fresh rennet and starter cultures, drying mats (aka sushi mats), cheese cloth and butter muslin, ash, calcium chloride. It’s almost like a little chemistry set, and if we do the experiments correctly, we get cheese!

We have about a gallon of Willow’s milk in the refrigerator. I’m hoping to take my first step into mold-ripened cheesemaking this weekend.

Greek Island Mizithra

I somehow managed to squeeze Forging Fromage’s October challenge, Greek Island Mizithra, between our trip to Scotland and the end of the month, but am just getting a chance to write about it now.

Mizithra - Sliced

The truth is, I don’t have much to say about this cheese.

It was simple enough to make (heat milk, add salt, add rennet, let curd form for an hour, cut curd, pour curd into cheese cloth and let drain for several hours at room temperature, and then 12 more hours in the refrigerator). The problem is that its simplicity resulted in a cheese with very little flavor. It was sweet and milky and fresh, but that’s not what I’m looking for in a cheese. At least, not these days.

It was only after I made this cheese that I learned that it’s traditionally made from a combination of leftover whey and goat or sheep milk, which may lend it some real tang. I wish I’d tried making it from goat milk instead of cow milk. And then aged it a bit.

Honestly. though, it’s not the cheese’s fault that I found it uninspiring. It’s my fault for spending too much time in the land of fresh cheeses where things feel easy and safe. It’s time to push myself and move on to the cheeses that convinced us to get goats and make our own cheese: soft, mold-ripened, tangy little goat cheeses.

I love the Forging Fromage group and plan to continue on with their challenges (next up is Queso Fresco, a fresh cheese I do like and will love using in our Mexican cooking), but I’m also going to leap ahead with my own cheese challenges. First up I think will be the beautiful, pyramid-shaped, ash-coated Valençay.

~~~~~~~~~~~
Love being elbow deep in milk? Come join us at Forging Fromage. Check the web site for the current recipes and their due dates. Make the recipe, write about it, then use the link on the site’s sidebar to post your creation to the group.

Ricotta Salata

September’s Forging Fromage challenge was Ricotta Salata, a pressed, salted, and slightly aged cheese made from fresh ricotta. So, in a way, this is a double challenge: make a batch of ricotta, then turn that ricotta into ricotta salata.

I was excited about this challenge. I’d already mastered making ricotta (a very simple cheese to make). This recipe would give me another way to use the ricotta, and more experience on aging cheeses.

Wait. What’s that sound? Is it the sound of the Cheese Deities snickering?

Yep.

I’m not entirely sure where I went wrong, but my first two tries at making ricotta for this recipe were dismal failures. I tried first with a half gallon of cow’s milk (store bought). I ended up with very few curds and a milky whey. For that batch, I think I got too overconfident and didn’t watch the temperature closely enough.

Fine. A gallon of milk down the drain. What a waste.

Rather than run out to the store to get another half gallon, I figured I’d use what I had on hand: fresh goat milk.

Failure again. This time I think my mistake was too much stirring and checking. Once again, I ended up with very low yield: maybe a 1/4 cup from a half gallon of precious milk. Milk I had earned the hard way. A pint at a time.

I couldn’t even bear to look at that pitiful little pile of ricotta in the cheesecloth.

I seriously began to wonder if I was cut out for this cheesemaking adventure at all. (I won’t go into details here, but it was around this same time that I wasted a gallon of milk on a failed mozzarella making session.)

But I’m determined to get this right, so, a few days later, I bought more milk and tried again.

After pouring the milk in a large pot, I mixed a teaspoon of citric acid with 1/4 cup of cool water, then thoroughly stirred the citric acid mixture into the milk.

Ricotta Salata - Mixing ingredients

Then I calmly and patiently let the milk heat up to 190 degrees, and resisted the temptation to stir the mixture too much.

Patience rewarded: curds and whey separated right around the correct temperature. I thanked the Cheese Deities and then carefully ladled the curds into a butter-muslin lined colander to remove any extra whey.

Ricotta Salata - Ricotta

With the ricotta itself made, I was ready to venture into Ricotta Salata territory.

I measured out 1 cup of the ricotta, and put it in a cheesecloth-lined press, put the press on full pressure (which is, I believe, from 40-50 pounds on this little press) and let it sit for 3-4 hours.

Ricotta Salata - Pressing

Thinking back on this process, I wish I had pressed for two hours on one side, flipped the cheese over, and pressed for another two on the other side, just to give the cheese more even pressing and texture. Next time.

After it was pressed, we had a nice solid round of cheese. My beautiful assistant helped me rub it with 2 teaspoons of salt, then I wrapped it in a clean piece of butter muslin, put it on a plate, and then into the refrigerator for the cheese’s first two days of aging.

Ricotta Salata - First salting

Two days later, I unwrapped the cheese, resalted it with 1 teaspoon of salt, flipped it, rewrapped it, and returned it to the refrigerator.

Ricotta Salata - Second salting

At this second salting, I noticed a rind had developed, as well as several cracks on the outside edges. The cracks are likely due to the low humidity in the refrigerator.

Ricotta Salata - After aging four days

One way to deal with this is to age the cheese in a plastic container in the refrigerator (with or without a damp cloth in the container, depending on the level of humidity needed). I didn’t try this for this cheese, but it’s something I ought to do if I make it again.

One more salting, two more days of aging, and the cheese was ready to cut and eat.

Ricotta Salata

After all the effort and wasted milk and second-guessing my cheese-making worthiness, I wish I could say I loved this cheese, but I don’t.

The paste is smooth and creamy. It tasted great in slivers in my salad last night, but the overriding flavor is salt. And the short aging time means the cheese never develops a complex flavor. As this post says, it’s the cheese that can’t stand alone. You don’t really want to take a slice of it to nibble while you sip your glass of burgundy. Instead, you want to cube it or sliver it or shave it and add as an ingredient or garnish to whatever else you’re cooking.

Even if I never make this cheese again, Ricotta Salata helped me remember something I’ve been (re)learning in the barn, too: slow, steady patience gains me more than any frenetic effort ever does.

Last night, I optimistically took a full gallon of fresh goat milk out of the refrigerator and made ricotta. It made the most tender, sweet ricotta curds I’ve ever tasted. I took a small bowl, filled it with warm ricotta made just minutes before, sprinkled it with a little salt, and then drizzled it with honey.

I didn’t hear any snickering.

~~~~~~~~~~~
Love being elbow deep in milk? Come join us at Forging Fromage. Check the web site for the current recipes and their due dates. Make the recipe, write about it, then use the link on the site’s sidebar to post your creation to the group.

Cultured Butter

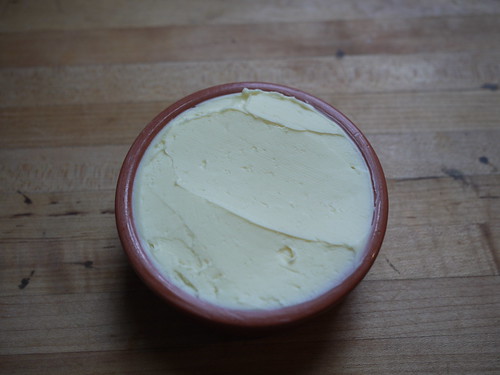
Cultured Butter

The Forging Fromage group had two challenges for August: cultured butter and Colby cheese. I’d love to say I made both, but this month has been a bit crazy (which explains why I haven’t been writing much here) and I just haven’t yet had a day this month where I could set aside enough hours for real cheese making. Sorry, Colby, we’ll have to reschedule for another time.

Butter making, however? Sure, I had time for a quick get-together with butter!

The fact is, butter making is very simple. Take heavy cream, agitate it for awhile (shake it in a cup, beat it with a whisk, tell it all the things it’s done wrong) and before you know it the milk fats consolidate, the rest of the milk falls away, and you have butter (and, as a side benefit, you also have buttermilk).

Making cultured butter is much the same process, only you first let the cream ferment briefly either by letting the cream sit around for a few days to naturally begin fermenting, or by introducing the cultures directly, either via cheese making cultures or an already fermented dairy source, like yogurt. The recipe we followed used yogurt as the starter.

The first step is to mix the cream with some whole milk yogurt in a glass or ceramic bowl (you can find the recipe with quantities here). Then let the mixture sit overnight. The next morning, it will have thickened and started to bubble a bit. Taste it to see if it’s slightly tangy. You want that slightly sharp flavor. That’s the “cultcha”.

Cultured butter - Cream and yogurt

Once you’ve got the flavor you want (it could take from 12-18 hours or even more, depending on the temperature of your kitchen), put the mixture in a mixing bowl and beat it, preferably with a whisk attachment. At first you’ll just have a liquid mess, then you’ll have whipped cream (which is a tempting place to stop the whole enterprise), and then, suddenly, magically, you’ll have butter on the beater and buttermilk in the bowl. Stop mixing!

Cultured butter - Mixing

Strain off the buttermilk and reserve for another use, and then press the butter to remove as much remaining buttermilk as you can. Then pour ice water in the bowl of butter, to cover the butter, and start kneading the butter under the ice water. The idea here is to keep the butter in a solid mass while still extracting as much buttermilk as you can. Buttermilk left in the butter tends to make the butter spoil more quickly, so you want it out.

I started kneading with my hands, and while that was satisfying, the water was so cold, the process quickly turned painful. So I reached for our potato masher instead and that made a fine kneading tool.

After kneading for a few minutes, pour off the water/buttermilk, add fresh, clean ice water, and repeat, until the water remains clear.

Cultured butter - Straining and washing

When the butter is clean, remove it from the bowl and knead it on the counter or a board for just a minute to make it smooth. You can’t knead for too long outside of the ice water because the butter begins to melt and you get a mess. Just knead it long enough to smooth it out and consolidate all the separate bits of butter. At this point, if you wish to add salt, you can knead that in, too.

Cultured butter - kneading

You have buttah!

If you don’t eat it all right away (this recipe makes about 12 ounces of butter, so I really hope you don’t eat it all immediately), you can store it in your butter keeper or dish, or you can roll it into logs, wrap in plastic, and put it into long-term storage in the freezer. You can also freeze the buttermilk, or use it in the next couple of days for any recipe that calls for buttermilk.

Cultured butter - results

We made buttermilk biscuits, which we then slathered with the butter we made (doesn’t that sound slightly, I don’t know… wrong?).

I put one third of the butter in a small butter dish, and the other two thirds are wrapped and safe in the freezer. ‘m thinking about that butter right now. It’s calling to me. Time to make a fresh loaf of bread?

~~~~~~~~~~~
Love being elbow deep in milk? Come join us at Forging Fromage. Check the web site for the current recipes and their due dates. Make the recipe, write about it, then email your link to the contact email listed on the site to be included in the posted round-up.

Gouda

Gouda - Ready to cut open

The Forging Fromage group had two challenges for us in July: the quick and easy Yogurt Cheese, and our first aged cheese: Gouda.

I had hopes of making this a goat gouda, but the scarcity and cost of goat milk around here until very recently had me think twice about that, so we made this cheese with some fresh, local cow’s milk instead.

The process for starting the cheese is similar to that for making the feta: warm the milk (this time to 85 degrees F), then mix in the starter culture (this time, we used prepared mesophilic starter culture, rather than the cultured buttermilk that did the trick for the feta), then thoroughly mix in the rennet and let the milk sit for a couple of hours until the curd is set and we got a clean break.

Gouda - Ingredients and curd setting

After the curds had set up, we cut them into 1/2″ cubes, let them sit for 10 minutes to begin draining the whey, and then began to cook the curds. This is where things get difficult for me.

Even with a double-boiler setup and a deep sink filled with cold water, I find it challenging to maintain a constant temperature over a long period of time. I slowly bring the curds up to just below the target temperature (in this case, we needed to go from 85 degrees F to 102 degrees F over the course of about 45 minutes), and then the curd temperature inevitably goes higher than my target temperature and I pull the milk pot out of the double boiler, put it in the sink full of cold water to drop the temperature, then put it on the counter. It works, but it means constantly monitoring the thermometer and juggling the pot from temperature to temperature to maintain a more-or-less consistent temperature where the curds are being cooked enough to release the whey, but not too much so that they harden and turn rubbery (which detrimentally affects both the consistency and acidity of the final cheese).

The next step is where we diverged from all other cheese recipes we’ve tried so far: once the curds were up to temperature, we carefully removed three cups of whey and replaced it with three cups of 102 degree F water. Every 15 minutes (while maintaining that temperature), we repeated the process, until we had removed whey and replaced it with water three times.

Gouda - Cutting and cooking curds

At that point, the curds were fully cooked and it was time to drain the remaining whey. (Note: Since this was a hard cheese, I had planned on making ricotta from the drained whey, but I was unsure if it would work with the watered down whey. I saved the whey we drained off and did make ricotta by adding a bit of whole milk. You can see the delicious results here.)

Now it was time to press the cheese. In the past, when we’ve made pressed cheese (paneer and similar cheeses), we’ve used the age-old method of stacking heavy tomato cans or pots of water on the cheese, and that’s what I was prepared to do this time around. The recipe called for two pressings, the first at 20 pounds for 45 minutes, the second at 40 pounds for three hours. My plan was to use a combination of bags of flour and pots of water.

And then M found us a really inexpensive little cheese press on ebay! It’s nothing fancy, and the mold that comes with it isn’t useful because it doesn’t have any drainage holes, but I had bought a hard cheese mold already and it just barely fit into the press. With a few other adjustments and some tinkering, we figured out how to make it work with our mold and then pressing was easy as pie.

Gouda - Putting curds in press

After pressing, turning, and then re-pressing the cheese for a total of about four hours, we had a cheese! It was soft and delicate, but it held together and looked like, well, cheese. Honest-to-goodness cheese. We did a little Happy Cheese Dance in the kitchen.

The last step before aging is to brine the cheese by floating it in a salt solution (1.5 cups of salt in one quart water) for 3 hours, flipping the cheese every 45 minutes to make sure it’s evenly coated. The brine initiates the rind development that would continue over the next 25 days in the “cave” (in our case, that’s currently our regular refrigerator). After brining, we patted the cheese dry, and put it on a sushi mat in the refrigerator and crossed our fingers.

Gouda - Pressing and brining

For the next 25 days, we turned it daily, and rubbed all the surfaces with a salt water solution. From time to time, a tiny amount of blue/green mold appeared on the rind — just a few spots — but we rubbed that away with the salt water and the mold never progressed beyond that.

This morning, we took the cheese out and sliced into it (having aged it for 26 days).

Gouda - Cut after 25 days

And we did another little Happy Cheese Dance, because, you know what? It looked and tasted like gouda! It’s mild. It can use some aging to develop the flavor, but it definitely tastes like a real gouda. The rind’s a bit thicker than we’d like, but that’s due to the less-than-ideal aging conditions in our refrigerator.

We made gouda! In our own kitchen! Maybe we really can do this?!

(Before I get too carried away, I should tell you about my recent cheddar disaster, but that’s a tale for another day…)

We’re going to eat half of the wheel this weekend, and we’re going to try waxing the other half and letting it age some more. And I have a feeling it won’t be long until we’re trying our hand at a goat’s milk gouda.

~~~~~~~~~~~
Love being elbow deep in milk? Come join us at Forging Fromage. Check the web site for the current recipes and their due dates. Make the recipe, write about it, then email your link to the contact email listed on the site to be included in the posted round-up.